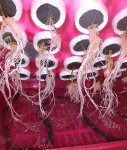
DIY- Shallow Bubble Cloner (re-fresh)

jpcyan2

In Bloom
This is an effective system to root cuttings I have used for many years. After some problems in the tent with Powdery mildew, and a slime like issue in the bubbler (similar to "Ick" in an aquarium), I decided to give it a complete once over. There are many options here and I am listing just what I used this time.

Components for this build:
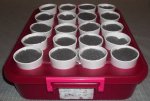
1- Sterilite brand container with lid and locking handles - 6.2 qt/ 5.9L -15"x 11.5"x 3.25" Red works best to reduce potential algae growth FME. Also tried green and clear
1- aquarium air pump - single or dual outlet (this one is rated for 40 gal aquarium)
1 or 2- air stones or flexible bubble wand
1- section airline tubing (cut to desired length for your application)
1 -package 8.5 oz foam cups (20 in this unit)
1- package window a/c foam insulation (see specs on bag)

Tools needed:
1- pair small nail scissors or new sharp x-acto or razor blade
1- Hole saw (2"inch for my setup)
1- Drill (reversible and variable speed works best)
1- Drill bit (slightly smaller than the airline tubing for a snug fit)
1- Electric Carving Knife ( Not essential but makes cutting the foam a breeze)

#1 DIY SBC components - Copy.jpg
 

jpcyan2

In Bloom
Tips on cutting holes in the lid or plastic containers/lids in general:

Depending on the brand, some containers are more supple while others quite rigid. The more rigid, the better chance of cracking while cutting.
Rubbermaid products are usually a softer more pliable material and cut more easily without extra precautionary steps.
This Sterilite container was quite rigid. Here's a few ways to reduce chances of cracking.

Test cut/hole saw on a scrap tray, tub, or container to get a feel for it. Varying your drill speed/ applied pressure etc..
Using a heat gun or hair dryer may help soften the plastic before each cut. Careful not to melt or char the material.

Place some cut to fit pieces of cardboard under the lid to reduce flex. It might take multiple layers to get a more solid backing. Work on a solid surface.
Use your hole saw/drill in reverse at a slower speed.
Cover the surface with masking or blue painters tape. (Both sides is even better)
Mark your center holes and line up the configuration you choose on the tape.

Drill 1 or 2 small holes for the airline tubing to enter the tray. Just 1/4" below the locked on lid. Make sure the tubing fits snugly to prevent leaks.

Have a spare lid, or whatever plastic item you are attempting to cut, drill.. just in case ;)
Almost forgot. Wear Safety Glasses.
 
Last edited:

jpcyan2

In Bloom
Using the scissors, or a very sharp razor knife, cut the bottom from the foam cup. Leave a small lip as shown.
Now cut the lower section of the foam cup just below the first molded ridge. Approx 1.25-1.5" inch in my case.
Test fit into your lid for a snug grip before cutting all the cups.

Using an Electric carving knife (like for ham or turkey) slice the A/C window foam into approx 1"in. sections.
I also slice off the corners for an octagonal shape. Then cut a split from one edge to the center of the foam.

see pics:

#2 cut cups and foam inserts - Copy.jpg
 

jpcyan2

In Bloom
Make sure the tray, bubble stone or bubbler, and lid are clean, and begin assembly.

I add a gallon or so of tap water and let the unit run for a day or so. Then replace the water with your fave solution or plain water.
Cut your clones and insert into the slot in the foam, then insert the foam in the cup.

Having an additional matching tray makes cleaning the rez simple. Just remove the lid with cutiing and roots. Place on empty clean matching tray,. Clean your existing rez, refill, and replace the lid.

I prefer the open cell foam to neoprene collars for a couple reasons. Neoprene does not breath well and I've lost many clones to rot or sloughing off of the outer layer of stem tissue. The other reason is your holes in the lid must be exact to secure the neoprene collars, which then squeeze tightly on the stems and once wet, they stay wet. Too wet in my trials. But each DIY'er will find their own best way.

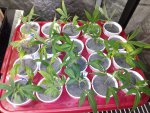
I have rooted 20-40 cuts at a time in this design. Usually getting healthy roots in 5-10 days. 3 of my grobros locally, all use this exact design.
For over 15 yrs we have all used this successfully. Refreshing the components as needed.
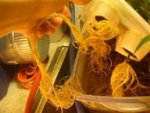
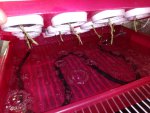
The short profile and small size allows it to be placed almost anywhere. #3 bubbler  refresh - Copy.JPG #5 Bubbler refresh.JPG #4 bubbler refresh.JPG

This was thrown together tonight. I am running just plain water and hope to add cuttings tomorrow. Hopefully have some in-use progression pics to follow.

Good luck and keep it green
 
Last edited:
Top Bottom