?Why am I not surprised you could dig up some information out of that magical library? ? Thank you brother.
You are using an out of date browser. It may not display this or other websites correctly.
You should upgrade or use an alternative browser.
You should upgrade or use an alternative browser.
Schwaggy P's Random Stuff
- Thread starter Schwaggy P
- Start date
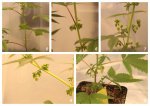
Giesal x Skunky D testers week 7ish. <9week from seed. Quick shots,I'll get better shots Schwaggster. 2 plants bottom right-ignore them.
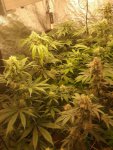
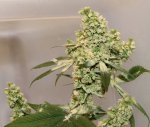
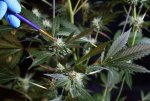
P1 She has taken my not so ideal environment and bland(low ppm) feedings in stride. No pissyness or fussing.Nice bud stackage.
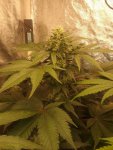
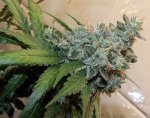
P2- Fastest to start flower,no muss no fuss aside from this one leaf.
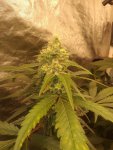
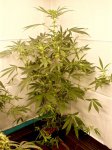
P3- Stacking hard n thick. She's a lil fussy nd prissy.No adjustments made.The ugly leaf syndrome stopped there.All new growth has been lush.
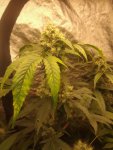
P4- THIS is the stank girl.I dub thee NECROSIS. Putrid,gagging stem rub. I haven't touched the others as this one is right near the door,easy access. Damn She's rank. A lil slower to stack as well.
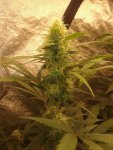
P5- The other fussy gal. She was one of the shorter ones at the beginning of flower-stretch. She is now one of the tallest.
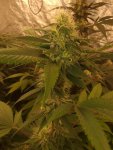
Finally,P6- Shortie Doo-Wop. My favorite structural and height-wise.


P1 She has taken my not so ideal environment and bland(low ppm) feedings in stride. No pissyness or fussing.Nice bud stackage.

P2- Fastest to start flower,no muss no fuss aside from this one leaf.

P3- Stacking hard n thick. She's a lil fussy nd prissy.No adjustments made.The ugly leaf syndrome stopped there.All new growth has been lush.

P4- THIS is the stank girl.I dub thee NECROSIS. Putrid,gagging stem rub. I haven't touched the others as this one is right near the door,easy access. Damn She's rank. A lil slower to stack as well.

P5- The other fussy gal. She was one of the shorter ones at the beginning of flower-stretch. She is now one of the tallest.

Finally,P6- Shortie Doo-Wop. My favorite structural and height-wise.

Texagonian
CHOOSE YOUR TITLE
Thank you, just gonna say it as many already know. Don’t sleep on Schwaggy or 313 seeds. Gone in a blink of an eye. Thanks again @Schwaggy P , I will succeed!Don't have a date set, but most likely in the next couple weeks.
The phenotypes don't seem to be drifting too far from each other in flower expression. The last few P# look very similar. I like the overall look of the P1. That raunchy smell is good to hear, it's got me lining up the Skunky D male to hit a nice Giesel bush that just flipped.Giesal x Skunky D testers week 7ish.
Agreed,P1 is the overall beauty in the pageant.The phenotypes don't seem to be drifting too far from each other in flower expression. The last few P# look very similar. I like the overall look of the P1. That raunchy smell is good to hear, it's got me lining up the Skunky D male to hit a nice Giesel bush that just flipped.
I would like to share my method of pollen collecting and targeted single branch pollination. If you decide to replicate this process for yourself, please be warned that having a male dropping pollen requires great care. I have organized this information into 3 sections: Flowering the Male, Collecting/Storing Pollen, and Pollinating a Single Branch.
I usually take clones of males to keep their size manageable. Once they are rooted, I plant them in a 3” square pot and put them in a clear storage tote (pic 1). You will want to keep the tote lid slightly ajar to allow for air exchange.
Where to keep him depends on whether you have a free tent, separate veg space, or just another room with sunlight. For times when all tents are taken, I keep the male in my veg area (pic 2). It is important to remember that he will be separated from the flowering females.
? In the corner of your veg room or peripheral splash over light is just fine to trigger the male. There’s no need to put him 3” beneath a 1000W DE, I’ve flowered males from the spillover light of a T5.
If you have a single tent with females flowering, the ambient light in another room is enough to accomplish our task.
The 12hr dark cycle is achieved by placing a box over the male’s clear tote (pic 3). This 12/12 box covering will trigger and maintain flowering through the entire process until you’ve collected enough pollen.
? Make sure the box is large enough to cover your storage tote before you begin.
If you are triggering a male for a one-time pollination without storing pollen, then timing will be important. Males will usually develop flowers pretty quickly relative to their female flower setting counterparts. Since we want our females to have a decent flowerset to accept pollen, we have to give her some time to develop them. With most strains, weeks 3-4 will give us the best window to have both nice flower setting and early enough to give the seeds time to mature.
? Don’t trigger your male until about day 10 of flower for your females. This gives females the head start to ensure there will be nice sized buds to give you seeds, as well as not have to deal with and worry about a male dumping tons of pollen too early.
This 12/12 box cycle will continue for the duration of pollen collection.
? You want to approach most things in this process slowly and carefully. There is no extra credit for speed. Being gentle and deliberate with him will ensure any pollen stays within the tote. Pretend you’re doing tai chi at the senior center when you interact with him.
As you gain confidence and success with this process, you can flower multiple males simultaneously (pic 4).
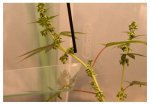
Keep in mind, the goal here is to be aware of his maturity in order to collect pollen long before he creates dust storms. At first, his flowers will be small balls (pic 5) that are not much of a threat to your females at this point. As they begin to develop, you will notice that they cluster and start to hang (pic 6). Usually this timeline window can be from 10-20 days. As the male flowers begin to individualize from the clusters you are now on pollen watch.
? This is the point at which you will need to be very careful about moving him around and watering him.
Once you begin to see the male flowers open, the yellowish anthers will be visible (pic 7) but not drop pollen just yet. The pollen is only hours away at this point, so remain vigilant. If you try to collect pollen as soon as the male flower opens, you’ll find no pollen freely drops, so wait until you see the anthers go from a tight smooth sheen, to bloated matte yellow (pic 8 ).
If you find that you are having issue timing the pollen drop, you can wait until one of the flowers releases pollen onto a leaf below (pic 9).
The male flowers will reach maturity at different rates, which we can use to our advantage. The older male flowers will be first to drop and keep in mind we are only needing a few flowers worth of pollen in order to pollinate multiple single branches. By collecting the first few pollen drops, we are containing the threat of stray pollen.
Last edited:
Now that our male has begun dropping pollen, we can start our collection. I like to use a piece of glass (taken from a dollar store picture frame) and a coffee stirrer to free and collect the pollen.
? Make sure to kill any large air movers that may disturb this process. The only air circulators you may want going is an extraction fan that can create the negative pressure to keep any stray pollen inside of a tent.
You will position your glass under the flower that is ready to drop, and just slightly agitate it with the stirrer. A slight small nudge is all that you need to free the pollen (pic 10,11).
Then, you will slowly use a razor blade to transfer the pollen from your collection surface into a storage container (pic 12). I use narrow necked glass vials.
?Remember: we only need to collect 3-4 male flowers worth of pollen to have several single branch pollinations.
If you have no intention of collecting pollen for future work, then this single pollen collection is all you need to dust some branches (pic 13). So at this point, the male’s job is done and we can dispose of him long before he starts to really open up and create a high risk for accidental pollination.
You can use any smooth surface to collect the pollen. When there are hard to reach male flowers, I switch to a plant tag for collection (pic 14,15), so just be creative with what you have.
?When you trash the male, be sure to change your clothes and shower before going near the flowering females. While there won’t be much pollen this early, it’s better to be safe than sorry.
Sometimes, I like to let the male flower out for long periods for larger stores of pollen and to make sure he doesn’t hermie later in flower. You can see the risk factor for accidental pollination escalates quickly at the male’s later stages, as he dumps tons of pollen. Ideally, your male will be long gone before this can happen (unless you want it to happen )
With your collected pollen (pic 13), you have 2 choices:
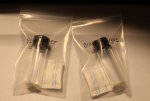
The next day, you can cap your container and place it in a labeled bag with a small desiccant for long term storage. Make sure to include the date the pollen was collected so that viability can be tracked. I like to prepare single-use vials that have just enough pollen so that when I take out and use it, there is nothing left. I don’t have to worry about freezing and defrosting the same container.
?I try to use up pollen within a year of its collection. As the viability begins to drop off, you’ll notice fewer pollinated flowers as you continue to use the pollen. You’ll want to refresh your pollen bank as you notice the reduction in viability.
You can keep your packaged pollen containers in the freezer until you are ready for pollination. I keep a drawer in the freezer full of various pollens. Whenever I have female plants that are ready for dusting, I can make several crosses without having to constantly juggle multiple flowering males.
? Make sure to kill any large air movers that may disturb this process. The only air circulators you may want going is an extraction fan that can create the negative pressure to keep any stray pollen inside of a tent.
You will position your glass under the flower that is ready to drop, and just slightly agitate it with the stirrer. A slight small nudge is all that you need to free the pollen (pic 10,11).
Then, you will slowly use a razor blade to transfer the pollen from your collection surface into a storage container (pic 12). I use narrow necked glass vials.
?Remember: we only need to collect 3-4 male flowers worth of pollen to have several single branch pollinations.
If you have no intention of collecting pollen for future work, then this single pollen collection is all you need to dust some branches (pic 13). So at this point, the male’s job is done and we can dispose of him long before he starts to really open up and create a high risk for accidental pollination.
You can use any smooth surface to collect the pollen. When there are hard to reach male flowers, I switch to a plant tag for collection (pic 14,15), so just be creative with what you have.
?When you trash the male, be sure to change your clothes and shower before going near the flowering females. While there won’t be much pollen this early, it’s better to be safe than sorry.
Sometimes, I like to let the male flower out for long periods for larger stores of pollen and to make sure he doesn’t hermie later in flower. You can see the risk factor for accidental pollination escalates quickly at the male’s later stages, as he dumps tons of pollen. Ideally, your male will be long gone before this can happen (unless you want it to happen )
With your collected pollen (pic 13), you have 2 choices:
- If you’re doing just a few branch pollinations, the staggered timing of triggering the male, means your females are ready to be dusted and there is no need to worry about storing the pollen. You could move on to the section (Pollinating a Single Branch).
- If you would like to store the pollen, allow the container to dry overnight in a safe place away from fans. This allows any residual moisture to be purged for long-term storage.
The next day, you can cap your container and place it in a labeled bag with a small desiccant for long term storage. Make sure to include the date the pollen was collected so that viability can be tracked. I like to prepare single-use vials that have just enough pollen so that when I take out and use it, there is nothing left. I don’t have to worry about freezing and defrosting the same container.
?I try to use up pollen within a year of its collection. As the viability begins to drop off, you’ll notice fewer pollinated flowers as you continue to use the pollen. You’ll want to refresh your pollen bank as you notice the reduction in viability.
You can keep your packaged pollen containers in the freezer until you are ready for pollination. I keep a drawer in the freezer full of various pollens. Whenever I have female plants that are ready for dusting, I can make several crosses without having to constantly juggle multiple flowering males.
Last edited:
Now that we have our pollen collected, we can pollinate females that are ready. You’ll need:
When you have a chosen female, remove her from the flowering space into a different room to administer the pollen (pic 16).
Choose a branch from the mid to lower section of your female that will receive light through the canopy (pic 17). Choosing a branch that is not tangled with others and has free range of motion will make this process easier.
Make sure the branch you choose and the buds you plan to pollinate will fit inside of your paper bag (pic 18 ).
Affix your tag to the chosen branch just below the last bud you can fit into your bag (pic 19). This will help you at harvest time to know how much of the branch to cut to separate from your sensi bud.
With all fans and air circulators turned off, you can begin the pollination process.
?When using a freshly clean brush, the pollen will have a tendency to fall from the tip. Gently tap your brush into one of the targeted buds to get some resin on your brush BEFORE you collect the first bit of pollen onto the brush. That little bit of stickiness from the resin will make sure the pollen doesn’t fall from the brush.
We only need the tip of the brush to have pollen, this keeps the pollen within our control and is plenty to achieve our goal. Try to load your brush against the wall of the container first (pic 20). When you load the brush from the pollen pile, try to get just enough, no need to dive into the middle of the pollen (pic 21).
With your brush, slowly and gently poke your female flowers with the first few brush movements (pic22) this ensures the pollen payload isn’t flicked into the air by brushing it. Once you’ve done a few pokings around the bud, you can gently brush the pollen to “color –in” the bud.
?A little goes a long way, so you really do not need more than 2-3 brush tips of pollen for each bud site. Don’t think you need tons of pollen because excess can cause accidental pollination if it goes airborne.
With the pollen fully dusted, the paper bag can be placed over the branch (pic 23). The corner of the bag is then folded over and stapled (pic 24). With the branch bagged, all you need to do is secure the bag, this will depend on your particular method of support (pic 25).
?Make sure that the paper bag you choose does not have a wax coating on the inside. This coating can inhibit air exchange and cause problems.
With your female branches dusted and bagged (pic 26), you can return her to the flowering space (pic 27). The bag should remain on the branch for 5-7 days. After about a week, you can remove the bags and find a branch that is fully pollinated (pic 28).
? If you are worried about stray pollen after the bag is removed, you can take the female out of the flower space, remove the bag, and lightly mist the branch with water to deactivate any stray pollen.
We will allow the females to finish their flower cycle and harvest as usual. During chop, I cut the seeded branches at the tag and hang them separately (pic 29). You can use different pollen on the same plant (different branches) to achieve multiple crosses using the same female.
Picture 29 shows 7 different crosses from one tent. When the branches have dried, you can shuck the seeds and allow them to dry/cure (pic 30). Each branch (depending on size and strain) can yield between 150-300 seeds, giving you a nice seed drop of your own creation.
- Paper bags
- Tags
- Brushes
- Pollen
- Stapler
When you have a chosen female, remove her from the flowering space into a different room to administer the pollen (pic 16).
Choose a branch from the mid to lower section of your female that will receive light through the canopy (pic 17). Choosing a branch that is not tangled with others and has free range of motion will make this process easier.
Make sure the branch you choose and the buds you plan to pollinate will fit inside of your paper bag (pic 18 ).
Affix your tag to the chosen branch just below the last bud you can fit into your bag (pic 19). This will help you at harvest time to know how much of the branch to cut to separate from your sensi bud.
With all fans and air circulators turned off, you can begin the pollination process.
?When using a freshly clean brush, the pollen will have a tendency to fall from the tip. Gently tap your brush into one of the targeted buds to get some resin on your brush BEFORE you collect the first bit of pollen onto the brush. That little bit of stickiness from the resin will make sure the pollen doesn’t fall from the brush.
We only need the tip of the brush to have pollen, this keeps the pollen within our control and is plenty to achieve our goal. Try to load your brush against the wall of the container first (pic 20). When you load the brush from the pollen pile, try to get just enough, no need to dive into the middle of the pollen (pic 21).
With your brush, slowly and gently poke your female flowers with the first few brush movements (pic22) this ensures the pollen payload isn’t flicked into the air by brushing it. Once you’ve done a few pokings around the bud, you can gently brush the pollen to “color –in” the bud.
?A little goes a long way, so you really do not need more than 2-3 brush tips of pollen for each bud site. Don’t think you need tons of pollen because excess can cause accidental pollination if it goes airborne.
With the pollen fully dusted, the paper bag can be placed over the branch (pic 23). The corner of the bag is then folded over and stapled (pic 24). With the branch bagged, all you need to do is secure the bag, this will depend on your particular method of support (pic 25).
?Make sure that the paper bag you choose does not have a wax coating on the inside. This coating can inhibit air exchange and cause problems.
With your female branches dusted and bagged (pic 26), you can return her to the flowering space (pic 27). The bag should remain on the branch for 5-7 days. After about a week, you can remove the bags and find a branch that is fully pollinated (pic 28).
? If you are worried about stray pollen after the bag is removed, you can take the female out of the flower space, remove the bag, and lightly mist the branch with water to deactivate any stray pollen.
We will allow the females to finish their flower cycle and harvest as usual. During chop, I cut the seeded branches at the tag and hang them separately (pic 29). You can use different pollen on the same plant (different branches) to achieve multiple crosses using the same female.
Picture 29 shows 7 different crosses from one tent. When the branches have dried, you can shuck the seeds and allow them to dry/cure (pic 30). Each branch (depending on size and strain) can yield between 150-300 seeds, giving you a nice seed drop of your own creation.
Last edited:
Thank you.Love that I read the forum rules and know how to bookmark.. As always appreciate your knowledge drops brother. Just awesome
? He does look like Eddie.Love the album covers. At first I thought that was Eddie. Somehow didn't see the huge red Slayer in the corner. Lol
Texagonian
CHOOSE YOUR TITLE
Schwaggy the metal head. Love it, I am a die hard metal fan. If you are not, nice album art for the seed display anyway??Fresh shuck, two single branch pollinations (Green Crack S1 x Skunky Brewster).
I amIf you are not
Test run of (Appalachian Super Skunk x Schwaggy's Afghan Skunk), aka Sassy Ass (not final name, just mushing the abbreviations ASS x SAS). They have stretched more than I anticipated (Afghan Skunk tends to be on the shorter side). I got a couple shots while pulling them out for their post-stretch clean-up (pruning back lower/under growth).
@spyralout , did you find any phenos with a serious stretch? For reference, these are in 5" square pots.
The far right table in above pic is all Chocolate Mint OG (Emerald OG x GDP), my go-to nighttime smoke. She just eases aches/pains and gently brings you to sleep. Given the name and date of release, I believe she was an attempt to "recreate" a GSC type plant (OG x Purple), but outperforms her in just about every way (sorry, not sorry).
Similar threads
- Replies
- 51
- Views
- 1K
- Replies
- 144
- Views
- 6K


