BioBuds
In Bloom
Hi my green-minded friends,
Thank you for visiting my grow diary. I hope you can find helpful things and learn from my mishaps and experiments in a new setup. If you also are growing Gelato 33 Fast or have a similar grow setup or you encounter accidental revegging and are forced to monster crop while previously having never heard of this, welcome to this account of an adventure with plot twists and suspense.

Three clones of Gelato 33 by Advanced Seeds in different stages, will it ever become a single canopy?
Next to getting to know my grow setup, I'm working with new soil composition, a hybrid between coco and super soil. Also were trying out our compost tea made from comfrey. So these are a lot of variables and stuff to potentially go wrong. Also with our soil type, it should correct itself, but my PH and PPm meters aren't in yet so I will start the grow with some guesswork on the feed, for the 1st four weeks we should be ok with the starting nutrients.
The Setup:
My grow space is a Spiderfarmer 4.5 x 2 x 6.5 (140 x 70 x 200), not a standard width a little wider, which later gives me limited choices in grow lights so we'll get to that later. I chose this because it fits the space I had available and my friend had experiences with a square tent, that it's harder to reach the plants in the back.
Findings so far about the tent: I expected a little more quality from a tent in the higher range. Zippers are ok, but my friend's smaller rectangular tent from Secret Jardin has sidebars preventing the tent from sucking in, and I'm losing about a foot of grow space in the center of the tent. So I will have to fix this before plants get bigger, so the tent so far literally sucks.... Don't choose this option from Spider Farmer.
In this grow diary, which are the accounts of my first indoor grow in a new setup, I work with the Rubol V3 QBs 3 x 100 Watt in a self-made frame. Since my space is rectangular and longer than the 1.20 m standard (1.40 (4.5 ft)), I chose to make a custom board. I was looking at others like the Mars Hydro SP 3000 but the light is a meter wide so left and right I would have 20 cm of less lighted space. I then ordered the lights: RUBOL SAMSUNG LM301B QUANTUM BOARD V3 + CREE XP-E2 660NM+730NM 300W DIY KIT - Rubol groothandel in led verlichting voor horticultuur and had an old storage cabinet which I used parts of to make a frame for the lights. It looks shabby but it's sturdy and it works.
So far I'm pleased with the lights. After first installing them I was very disappointed with the results, however, after checking with Justin at Rubol I had made the mistake of not installing them in serial so the boards were getting a total of 100 Watts instead of 100 Watts per board from the driver. After hitting the switch it was as if the heavens had opened and shone down on me. Checking with the PAR meters on my phone I was in the correct lux and PPF readings, for as far as phone apps go.

The Soil:
After following Mr. Canuck on Youtube and his experiences with Subcools',- and Master Marks' super soil recipes, my own experiences with permaculture growing in the backyard, and a fondness of organically grown weed, I had decided to formulate my own super soil with what I had available. In Europe, we don't have Fox Farms Ocean Soil or Gaia green supplements, so I faked it with my own mix and ended up with a hybrid mix that remains airy and light needs only a few amendments later in the growth and the plants seem happy. My friend at the time, was growing in Batmix and similar and had all kinds of trouble with growing until he switched to the new soil and his plants took off. (this recipe is a simplified version in my next grow I have tuned it and will share my recipe) .
When I received his clones, they also took the new soil instantly, and instead of being stressed by the move by car, into new lights (formerly blurples) they exploded as you can see in the next weeks. Even though, as we later discovered, there was a catch with these clones...
Soil mix: 30 % cocopeat, 30% Bi Grow Biosoil by Atami, and 30% worm castings. I had opted for fewer worm castings however, there was no soil available except these bags so topped it off. It proved to be a happy little accident. I can seriously recommend this soil combination to any starting grower, just add water the first 4 weeks (with the right PH)
The Nutrients:
I had bought some BAC Biotablets to crush as topdress to replace the Gaia green amendment Canuck was adding. Also, we have our own comfrey compost tea in the garden, later in the diary I will make a small video of how to make it, or at least how I made it. Which although smelling horrible, works well with soil PH and surprising little smell in the tent. More like a full musky smell of Greenhouse and weed. I've grown to love the smell of farming in the morning
So the crushed Bio tabs are for when the soil mix I started with has lost its starting nutrients.
In the meantime, I add some BAC Calmag to support the extra need for the light. I also add some extra mils of Green Sensation by Plagron, just for the PK. I switch between Plagron and BAC for growing and blooming food. I also amend with some wood ash during flower.
To conclude: I use Topmax and sugar sirup during flowering to help develop bud growth and terps.
The Genetics:
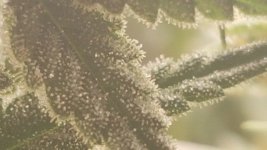
My friend has been growing indoor for some time now and had made me a clone from a cutting. These are Gelato #33 Fast by Advanced Seeds.
So with clones, I could have a rolling start and skip the whole seedling stage. A shortcut that would have some implications.
They seem a forgiving strain even under harsh circumstances, ideal for beginners like me.

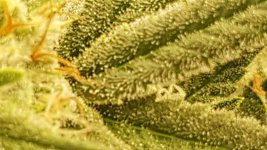
the largest clone at her former caretaker's grow room.
So we're off on our little adventure. Thank you for reading and please follow me if you like to see my mishaps and victories to come as I try to find my ideal way with this setup.
Thank you for visiting my grow diary. I hope you can find helpful things and learn from my mishaps and experiments in a new setup. If you also are growing Gelato 33 Fast or have a similar grow setup or you encounter accidental revegging and are forced to monster crop while previously having never heard of this, welcome to this account of an adventure with plot twists and suspense.
Three clones of Gelato 33 by Advanced Seeds in different stages, will it ever become a single canopy?
Next to getting to know my grow setup, I'm working with new soil composition, a hybrid between coco and super soil. Also were trying out our compost tea made from comfrey. So these are a lot of variables and stuff to potentially go wrong. Also with our soil type, it should correct itself, but my PH and PPm meters aren't in yet so I will start the grow with some guesswork on the feed, for the 1st four weeks we should be ok with the starting nutrients.
The Setup:
My grow space is a Spiderfarmer 4.5 x 2 x 6.5 (140 x 70 x 200), not a standard width a little wider, which later gives me limited choices in grow lights so we'll get to that later. I chose this because it fits the space I had available and my friend had experiences with a square tent, that it's harder to reach the plants in the back.
Findings so far about the tent: I expected a little more quality from a tent in the higher range. Zippers are ok, but my friend's smaller rectangular tent from Secret Jardin has sidebars preventing the tent from sucking in, and I'm losing about a foot of grow space in the center of the tent. So I will have to fix this before plants get bigger, so the tent so far literally sucks.... Don't choose this option from Spider Farmer.
In this grow diary, which are the accounts of my first indoor grow in a new setup, I work with the Rubol V3 QBs 3 x 100 Watt in a self-made frame. Since my space is rectangular and longer than the 1.20 m standard (1.40 (4.5 ft)), I chose to make a custom board. I was looking at others like the Mars Hydro SP 3000 but the light is a meter wide so left and right I would have 20 cm of less lighted space. I then ordered the lights: RUBOL SAMSUNG LM301B QUANTUM BOARD V3 + CREE XP-E2 660NM+730NM 300W DIY KIT - Rubol groothandel in led verlichting voor horticultuur and had an old storage cabinet which I used parts of to make a frame for the lights. It looks shabby but it's sturdy and it works.
So far I'm pleased with the lights. After first installing them I was very disappointed with the results, however, after checking with Justin at Rubol I had made the mistake of not installing them in serial so the boards were getting a total of 100 Watts instead of 100 Watts per board from the driver. After hitting the switch it was as if the heavens had opened and shone down on me. Checking with the PAR meters on my phone I was in the correct lux and PPF readings, for as far as phone apps go.
The Soil:
After following Mr. Canuck on Youtube and his experiences with Subcools',- and Master Marks' super soil recipes, my own experiences with permaculture growing in the backyard, and a fondness of organically grown weed, I had decided to formulate my own super soil with what I had available. In Europe, we don't have Fox Farms Ocean Soil or Gaia green supplements, so I faked it with my own mix and ended up with a hybrid mix that remains airy and light needs only a few amendments later in the growth and the plants seem happy. My friend at the time, was growing in Batmix and similar and had all kinds of trouble with growing until he switched to the new soil and his plants took off. (this recipe is a simplified version in my next grow I have tuned it and will share my recipe) .
When I received his clones, they also took the new soil instantly, and instead of being stressed by the move by car, into new lights (formerly blurples) they exploded as you can see in the next weeks. Even though, as we later discovered, there was a catch with these clones...
Soil mix: 30 % cocopeat, 30% Bi Grow Biosoil by Atami, and 30% worm castings. I had opted for fewer worm castings however, there was no soil available except these bags so topped it off. It proved to be a happy little accident. I can seriously recommend this soil combination to any starting grower, just add water the first 4 weeks (with the right PH)
The Nutrients:
I had bought some BAC Biotablets to crush as topdress to replace the Gaia green amendment Canuck was adding. Also, we have our own comfrey compost tea in the garden, later in the diary I will make a small video of how to make it, or at least how I made it. Which although smelling horrible, works well with soil PH and surprising little smell in the tent. More like a full musky smell of Greenhouse and weed. I've grown to love the smell of farming in the morning
So the crushed Bio tabs are for when the soil mix I started with has lost its starting nutrients.
In the meantime, I add some BAC Calmag to support the extra need for the light. I also add some extra mils of Green Sensation by Plagron, just for the PK. I switch between Plagron and BAC for growing and blooming food. I also amend with some wood ash during flower.
To conclude: I use Topmax and sugar sirup during flowering to help develop bud growth and terps.
The Genetics:
My friend has been growing indoor for some time now and had made me a clone from a cutting. These are Gelato #33 Fast by Advanced Seeds.
So with clones, I could have a rolling start and skip the whole seedling stage. A shortcut that would have some implications.
They seem a forgiving strain even under harsh circumstances, ideal for beginners like me.
the largest clone at her former caretaker's grow room.
So we're off on our little adventure. Thank you for reading and please follow me if you like to see my mishaps and victories to come as I try to find my ideal way with this setup.


.jpg")

.jpg")