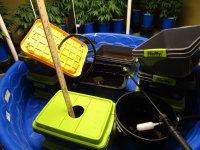
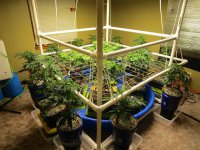
So 4 inch air gap from the opening on the plant reservoir so to speak and how far does the tailpiece need to extend down in to the water? I’m soaking this up! Also, what hose are you using to connect each plant site to the pump bucket? Thanks, hope all is well.
the end of the tailpiece needs to be immersed at all times to get the synergistic effect. with a 6" tailpiece and a 4 " air gap you still have 2" of solution in the system to back feed the plant during the interval between irrigation pulses and to act as a redundant source of water should the power go off or pump fails.
to understand the need for an "air gap" we first must understand the "perched water table".
growing in containers is fundamentally different than growing in the open soil column.
in the field, water applied to the surface around a plant continues through and past the root system leaving it well aerated. in other words water is not trapped in the root zone in a solid layer.
in a container, there is formed after every watering event a layer of solid water at the bottom of the pot.
the height of the perched water table (pwt) is determined by the particle size of the medium. the finer the particle the larger the pwt.
this layer of water occurs because the forces of cohesion (waters attraction to itself) and adhesion (waters attraction to other substances) are holding water in the container against the force of gravity.
this layer of "solid" water" contains no air.
in a conventional container it can only be eliminated by transpiration and evaporation.
the gravitational flow potential (gfp) rapidly drains a freshly watered container down to the point where the pwt forms but no further leaving the roots sitting in a pool of water.
this is fine for short periods as the water will contain some dissolved oxygen.
but a fast growing plant can consume the o2 content rapidly leaving the roots sitting in an anaerobic solution.
this is where anerobic bacteria thrive and root rot begins.
i also feel that it sends some type of hormonal signal to slow plant growth for survival.
all of this is why you can't water a conventional pot until it nearly dries out.
but what if we had a way to mechanically drain the pwt immediately after each watering event?
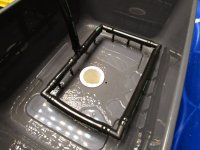
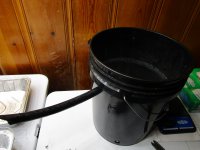
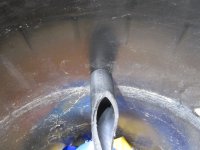
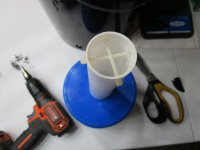
this is where the ppk "tailpiece" comes in.
since the pwt will exist at the same height regardless of container shape or size we can move it down into the tailpiece greatly reducing it's size and therefore it's negative effect on the plant.
by moving the pwt into the "tailpiece" the volume of the pwt is reduced radically.
by moving the pwt into the tailpiece we have greatly reduced the volume of the pwt and therefore its negative hormonal feedback by, hopefully, the same amount.
this is where the "air gap" comes in.
the pwt will exist on top of the water level in the tailpiece
if there were no air gap and water were to totally fill the tailpiece below each plant the pwt will still fully exist in the root zone.
by adding an air gap of at least 1.5" we can move the pwt into the tailpiece completely.
since water in a container is not evenly distributed but graded by gravity there is a moisture distribution curve. drier at the top and wetter at the bottom.
with only a 1.5" air gap the bottom of the medium will still be too wet because of capillary rise.
by tuning the air gap we can adjust the moisture distribution curve in the root zone.
with most media an air gap of about 4" plus or minus an inch not only removes the pwt from the plant container but tunes the moisture content of the medium.
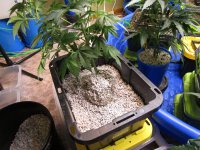
in the ppk we can totally control moisture content by using 3 tools.
the duration of each watering event, the interval between watering events, and the air gap, tuning the distribution curve in the root zone between events.
the root zone is an interface between roots, water, air, and nutrients. the more time during the life of the plant that this interface is kept in an ideal state the larger and heavier the plant will be.
 IMG_0945.JPG609.7 KB · Views: 17
 IMG_0946.JPG479.7 KB · Views: 19
 IMG_0959.JPG551 KB · Views: 16
 IMG_0939.JPG352.6 KB · Views: 21
 IMG_0956.JPG876.7 KB · Views: 18
 IMG_0957.JPG747.8 KB · Views: 18
 IMG_0960.JPG545.4 KB · Views: 12
 IMG_0961.JPG459.6 KB · Views: 12
 IMG_0962.JPG566.6 KB · Views: 12
 IMG_0963.JPG523.5 KB · Views: 17