something wicked this way comes!

greyfader

In Bloom
some quotes from another armoire grower. this is Rocketman64.

"I have grown two of the same variety side by side in soil and ppk and there's simply no comparison. PPK plants just freakin take off once they're established. The soil plants I've grown still end up nice plants but take way longer to pack on the beef. I can put a PPK plant into flower in less than two weeks from seed, soil takes 4 or more to get to the size I like for flowering.
Keep in mind, I don't grow trees and I'm not after huge yields, just quality. I grow only for my own consumption so the PPK is the perfect system for trying new strains as they mature quickly and show sex quickly.
I also forgot to mention the quality of the smoke from PPK vs. Soil. I've seen no noticeable differences in the taste or quality of the smoke when comparing the two. If anything, the PPK system seems to grow a bud that has a bit more stink to them for some reason. I can't say for sure if it's my lighting technique or something different but the bottom line is the taste and the medicine is there for me either way.
I've heard people say hydro-grown buds can have a chemical taste, never noticed this. I do not flush my plants at the end of the grow. If you know anything about biology, you would know flushing does absolutely nothing to change the plant's chemistry. The terpenes that are providing the smell and taste are not going to be affected by simply allowing the plant to suck water instead of nutrients, it just doesn't work that way.
So, in review: I can't tell the difference between my soil-grown plants vs. PPK-grown plants when we're comparing taste and the quality of medicine. Comparing growth rates and general health of plants, PPK is the CLEAR winner."
 

Brokehoe

CHOOSE YOUR TITLE
thank you!

mississippi or alabama?

i've always said that if they were to give the united states an enema they would stick it in mississippi! but they could do bank shots off of alabama, arkansas, louisiana, and tennessee.
Oddly none of them I'm from the land of fast cars, chicken fried steak and tobacco
i can say anything i want about miss. and ala. because i come from 200 years of dumbass, redneck, moonshiners, and dirt farmers from both states.

we don't have time to hate in this life!
I come from racist moonshiners also.
Hard working assholes
Thankfully I only got the hatred for authority
hi, yep, it grows anything! i've gotten 35 lbs of tomatoes from one 3.5 gal bucket. i've grown watermelons, squash, cukes, peppers.
That's amazing. I sell a few tomatoes in the summer, but that would make me good money. I'm very interested. I need pictures lol.
 

greyfader

In Bloom
Oddly none of them I'm from the land of fast cars, chicken fried steak and tobacco

I come from racist moonshiners also.
Hard working assholes
Thankfully I only got the hatred for authority

That's amazing. I sell a few tomatoes in the summer, but that would make me good money. I'm very interested. I need pictures lol.
north carolina!

i got the anarchist card at birth! always stopped just short of violence.

i don't know whats wrong with me, i just don't want to hurt anyone!
 

greyfader

In Bloom
as i've mentioned, this device is not a single build but rather a flow plan.

it can be built to grow monsters with full circulation and automation.

or it can be built drain to waste. a minimum drain to waste.

it can be passively operated by hand watering either recirculating or drain to waste.

a neophyte can start passive drain to waste very cheaply and then add automation in stages.

what would you folks like to see first?
 

greyfader

In Bloom
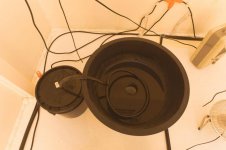
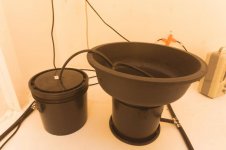
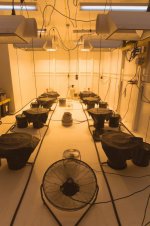
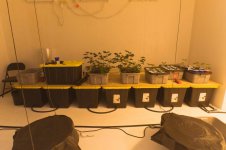
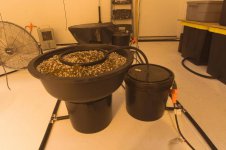
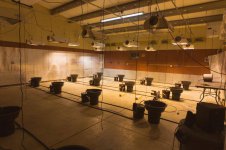
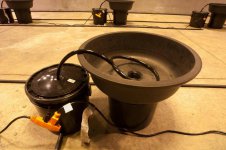
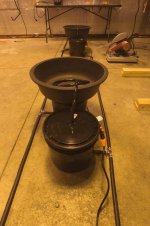
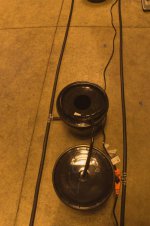
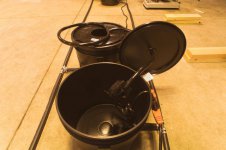
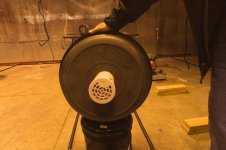
first, just a few shots of the veg room showing the general layout. the plumbing is very much an arterial/veinal type of thing in that the only crossover point from the supply side to the plant/drain side is the watering halo. there is an individual pump in each supply bucket. the pumps are eco 185's all fired simultaneously by a repeat cycle timer. the little pumps are remarkably reliable and put out uniform amounts so a simple electrical control achieves the same objective as a big pump with large plumbing and multiple valves.

the pumps are capable of delivering a quart in 15 seconds. the supply buckets act in a surge fashion by holding approximately 2.5 gals at the 7" level. more than enough to guarantee that the supply bucket never runs dry. when they fire and deliver the necessary volume gravity then rapidly equals out the water levels in the system.

it also guarantees positive displacement of solution throughout the system. guaranteeing equal readings.

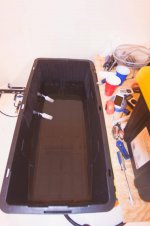
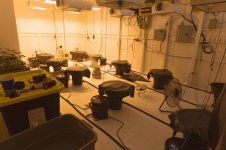
in the fifth photo are the reservoirs for the whole building. on the floor are 7 of the 55 gal totes which hold approximately 22 gals each at 7". they are plumbed in simple series fashion connected by a single hose between each.
 

Attachments

  • image_390218.jpg
    image_390218.jpg
    242.2 KB · Views: 18
  • image_390219.jpg
    image_390219.jpg
    166.5 KB · Views: 14
  • image_390220.jpg
    image_390220.jpg
    127.2 KB · Views: 15
  • image_390221.jpg
    image_390221.jpg
    257.3 KB · Views: 16
  • image_390222.jpg
    image_390222.jpg
    190 KB · Views: 17

greyfader

In Bloom
the first photo shows the side by side arrangement in the veg room and the plumbing as well as a complete, loaded module.

then on to the flower room showing the overall layout and the in-line arrangement we use there.

in the third photo you can see the supply and return lines are simply straight runs that do not overlap. no hoses cross over or under other hoses. this is possible because the supply lines are plumbed from one side of the room and the return lines are plumbed from the other side.

you could theoretically plumb a huge room with hundreds of plants in this same manner and still get equal solution readings anywhere in the system.
 

Attachments

  • image_390230.jpg
    image_390230.jpg
    204.4 KB · Views: 18
  • image_390231.jpg
    image_390231.jpg
    256.7 KB · Views: 18
  • image_390233.jpg
    image_390233.jpg
    287.2 KB · Views: 16
  • image_390232.jpg
    image_390232.jpg
    275 KB · Views: 11
  • image_390234.jpg
    image_390234.jpg
    271.7 KB · Views: 15

greyfader

In Bloom
here the first photo shows the pump arrangement.

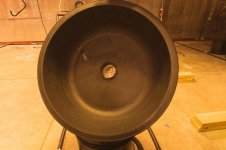
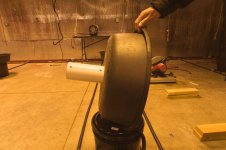
then the plant container showing the tom-kap fitting on the top of the tailpiece. it installs in a 3" hole.

then the tailpiece which is a piece of 3" pvc 7" long. top and bottom fittings are held in place by #10x1/2" stainless sheet metal screws. no glues anywhere and it can be knocked apart and packed flat for transport in seconds.

the last in this series shows the bottom fitting. as you can see there is no screen. the tailpiece is packed with xlp perlite only, which will not pass through the grating.

when we used tupur coco we would make a little mound of the xlp on top of the tailpiece about an inch high and 8" in diameter with a screen on top of the xlp but before the coco. this still positively drained the perched water table but prevented much coco fiber from travelling down the tailpiece and clogging the drain.

but now i'm going back to turface cut with xlp perlite and no screen is necessary. still filling the tailpiece with the xlp perlite only and then loading the tuface/perlite mix right on top of it.
 

Attachments

  • image_390236.jpg
    image_390236.jpg
    236.5 KB · Views: 7
  • image_390237.jpg
    image_390237.jpg
    225.5 KB · Views: 6
  • image_390238.jpg
    image_390238.jpg
    268.1 KB · Views: 6
  • image_390239.jpg
    image_390239.jpg
    259.2 KB · Views: 7

greyfader

In Bloom
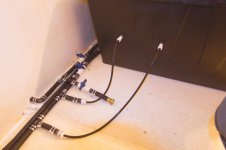
this shows the plumbing into the first reservoir. two float valves as one could have trouble keeping up with demand.

into this first tank out of sight behind the container is plumbed the return lines from both the veg and flower sides.

the first line against the wall with the elbow is the sole return line from 16 plant sites in flower.

the second line out from the wall is the return line from all the veg sites.

the third line out is the nutrient supply line from the volume/mixing tanks. you will notice a valve in line past the float feed connections. this valve allows you to bypass the floats and load solution at a much higher speed when refilling the system.

there are multiple drain points with valves set up in such a way as to allow partial or total draining of each part of the system. for instance the flower system, veg system, and the reservoirs themselves can all be drained individually or simultaneously as needed.

so we have the nutrient input and the return lines from each part of the system entering reservoir #1 and mixing through all seven tubs before exiting the last in line to supply the plants.

if we are pulsing 1/2 gal every 90 minutes with 28 sites that puts 224 gals per day through the reservoirs.
 

Attachments

  • image_390241.jpg
    image_390241.jpg
    144.8 KB · Views: 4
  • image_390242.jpg
    image_390242.jpg
    151 KB · Views: 4

greyfader

In Bloom
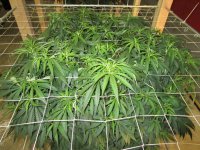
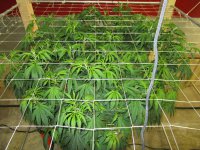
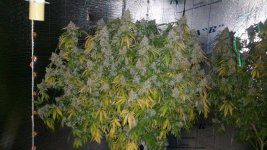
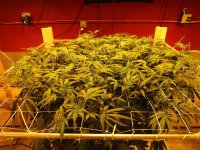
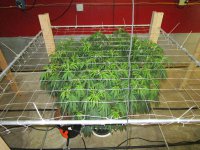
just a few shots of the typical plant finishing veg and going to flower
 

Attachments

  • image_400129.jpg
    image_400129.jpg
    828.3 KB · Views: 14
  • image_400125.jpg
    image_400125.jpg
    618.1 KB · Views: 13
  • image_398981.jpg
    image_398981.jpg
    607.9 KB · Views: 12
  • image_398980.jpg
    image_398980.jpg
    657.2 KB · Views: 12
  • image_398971.jpg
    image_398971.jpg
    759 KB · Views: 13
  • image_400122.jpg
    image_400122.jpg
    648.8 KB · Views: 13

greyfader

In Bloom
couple more interesting shots.

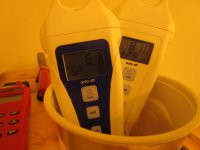
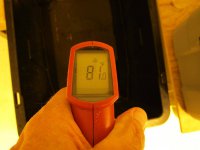
the first 2 show normal recirculating solution temp and conditions.

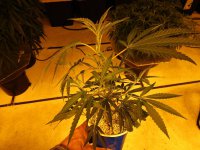
a normal fully rooted clone

the container is 22" across for reference. the medium here is pumice but i have used almost everything in it.

we ran prococo chips and fiber in the cbd room in nashville.

i have used turface, perlite, and rice hulls with success.
 

Attachments

  • image_400188.jpg
    image_400188.jpg
    257.1 KB · Views: 15
  • image_400189.jpg
    image_400189.jpg
    240.2 KB · Views: 8
  • image_404097.jpg
    image_404097.jpg
    560.9 KB · Views: 11
  • image_404096.jpg
    image_404096.jpg
    333.2 KB · Views: 15
  • image_454217.jpg
    image_454217.jpg
    614 KB · Views: 17

greyfader

In Bloom
1-2. the first 2 are the same plant 8 days apart

3-4-5. night shots really show the flowers

6-7. my friend miraculous meds darkstar

8-9-10. a few more of mine.

just to be clear i'm not showing the same plants here. with a couple of accidental exceptions, they are all different plants and strains.

typical flower times are 8-9 weeks. veg times are around 7 weeks to get this size.

i have hundreds of these pics .

but this is the big plant commercial version you see here.

most of these plants are too big for a tent or closet.

and the larger the plant the more difficult and labor-intensive it is to grow.

so please don't copy this build unless you have a lot of room.

it is radical overkill for the normal home medical grower.
 

Attachments

  • image_437853.jpg
    image_437853.jpg
    831.5 KB · Views: 14
  • image_437843.jpg
    image_437843.jpg
    751.1 KB · Views: 14
  • image_406091.jpg
    image_406091.jpg
    786.1 KB · Views: 18
  • mm2.jpg
    mm2.jpg
    113.2 KB · Views: 18
  • mm1.jpg
    mm1.jpg
    322 KB · Views: 18
  • image_475304.jpg
    image_475304.jpg
    555.5 KB · Views: 18
  • image_475303.jpg
    image_475303.jpg
    493.9 KB · Views: 15
  • image_475302.jpg
    image_475302.jpg
    624.5 KB · Views: 15
  • gg48day2.jpg
    gg48day2.jpg
    809.5 KB · Views: 14
  • gg48day1.jpg
    gg48day1.jpg
    549.9 KB · Views: 13

greyfader

In Bloom
the container you see here is a 7 gal feed tub from tractor supply or rural king, and some other outlets. this volume requires a 3" diameter "tailpiece tube.

the container is 6" tall.

it sits on a 3.5 gal bucket which is 11" high so this set-up has a height above the floor of 17".

we used 2 3.5's stacked in the cbd effort which made a 22" height. this is fine if you have 14' ceilings.

even larger ones outdoors have used 4" tailpiece

3.5 to 5 gal containers can use a 2" tailpiece.

and smaller ones usually get a 1.5" tailpiece.

since most home growers are extremely short on vertical height i recommend flat rectangular tubs. there are several brands on the market that are suitable. some are getting hard to source because of the pandemic.

for the beginner i suggest hand watering, drain to waste.

because i am in a temporary rental while i build a house and don't want to get all installed with re-circulation and automation, i am about to do a pheno hunt grow of the seedlings i got from ethos collective, using the hand watered, drain to waste method.

i believe this will help the most people in the shortest time frame.

if enough folks are interested i could show it here.
 

greyfader

In Bloom
yep, at one point i had 4-5 tons of turface. all used 5 gal bucket rootballs. i always meant to clean and reuse it for weed. but i ended up dumping it into kiddie pools outside and growing a bunch of veggies in them.

when i moved i put an ad on craigslist and someone showed up with a truck and trailer and their whole family with shovels and they spent 2 days moving it.

at other locations, i have washed and reused it. it gets better with age.

i'm working on a perlite method now with this device. but soon i'm moving into my forever home and will have lots of space to till it in.
 

greyfader

In Bloom
by the way, my friends call me D9. i picked the handle delta9nxs way back when i was signing up for overgrow. i had tried several different ones but they had all been taken so this is the first one that stuck. i know it's corny sounding in this day and age but i was desperate at the time and it's the only handle i've ever used online so i just live with it.

it doesn't mean jack shit!

but if you call me xs i won't know who the fuck you're talking about!
 
Top Bottom